


๐ Power up your Pixel 5 like a proโDIY battery replacement made sleek and safe!
This Pixel 5 Battery Replacement Kit features 0 cycle OEM-quality cells with built-in safety microchips, ensuring optimal performance and longevity. It comes with a full professional toolkit, detailed installation manual, and pre-installed adhesive for hassle-free installation. Compatible exclusively with Google Pixel 5 GTB1F models, it offers a 12-month warranty and dedicated customer support, empowering you to restore your phoneโs battery life confidently and cost-effectively.
| ASIN | B0BMT6QLV9 |
| Antenna Location | Phone |
| Battery Cell Type | Lithium Polymer |
| Battery Weight | 40 Grams |
| Battery cell composition | Lithium Polymer |
| Brand | Viimon |
| Brand Name | Viimon |
| Compatible Phone Models | for Google Pixel 5 |
| Customer Reviews | 4.2 out of 5 stars 220 Reviews |
| Item Weight | 0.17 Kilograms |
| Manufacturer | Viimon |
| Model Name | google,pixel,pixel 5 |
| Model Number | VLB-AP |
| Number of Batteries | 1 Lithium Polymer batteries required. (included) |
| Number of batteries | 1 Lithium Polymer batteries required. (included) |
| Recommended uses for product | Phone |
| Reusability | Rechargeable |
| UPC | 791974635496 |
| Voltage | 3.8 Volts |
B**D
Works great...BUT...
So bottom line, I was successful in replacing my defective Pixel 4 XL battery with this one - BUT: The process was extremely difficult, time consuming and potentially dangerous. For one thing, the original battery had already been professionally replaced with a factory authorized one about a 1.5 years prior. Upon opening the case and removing the necessary screws, I could not readily pry the battery away from its *unnecessary* (in my opinion) adhesive backing. Over the course of the next two hours, I was finally able to remove the battery, but by this time the battery was very deformed and I feared that it might burn at any moment - so much so that I did some of the work outside. That, plus the fact that there are two micro ribbon cables in contact with the back of the battery and these had gotten cought up in the black adhesive glue strips. This situation required a lot of patience as I gradually worked to free up the cables, risking tearing them in the process. Not fun at all. The rest of the installation took only a few minutes and everything worked fine. Keep in mind though, that when you replace a factory authorized battery with one of these, you lose wireless charging in the process. I'm OK with that, considering that my 4 XL is 4 years old and I will be replacing it later this year. My repair job, though successful, was not a job that the average person would want to attempt. In fact, I was surprised with my own success.
A**S
Post Install Bliss
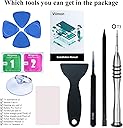
When I got a new Pixel 9, I gave my 12 year old son my Pixel 5. But within a few months it had split open with a really puffy battery. The Viimon Battery Replacement Kit for Pixel 5 was only $21.98, so I figured I had nothing to lose. In my case, the puffy battery had already broken the seal on one whole half of the phone. That made it very easy to remove the screen, which I understand can be one of the hardest parts of working on one of these sealed phones. So I can't comment on that, because in a sense I was lucky. The kit comes with instructions (including photos), and every possible tool you would need: mini screwdriver, tweezers, plastic pry, etc. as well as parts like a new edge seal. You have to remove some tape, disconnect a few things, remove about ten tiny screws, and then pry the old battery away from its adhesive. The whole process took maybe 15 minutes. The only part that was even a little challenging was reapplying a new sheet of edge adhesive, which is really narrow, and with the small area and stickiness, is like a Lego sticker set from hell. But again, no big deal. The result was a phone that was nice and flat. I put it back on the charger, and within minutes was able to boot it back up, no problem, no issues, just like nothing had happened. Compared to spending hundreds on a new phone, it seems like an extremely good value. The only real question is how long the battery will last. We will follow instructions and do a full charge/discharge/recharge cycle 3-5 times and see how it does. My hope is that it at least lasts half as long as the original, which survived for 4.5 years before failing. If you have any technical skills, and have enough manual dexterity to handle tiny screws, you should be able to do this. I wore two sets of reading glasses so I could see what I was doing. My son held a flashlight at times. I will provide an update later if anything changes, but right now I can say that I would definitely buy this kit again.
D**G
Perfect fit and great instructions
I was having issues with my Pixel 5. I really like my phone but my battery was dying after 2 to 3 hours without even being touched and the original battery decided to swell, pushing my screen off. As the last ditch effort I decided I'm going to try this battery and it completely brought my phone back to new working condition if not better. Even if I'm playing with my phone, watching videos, playing games or whatever else I want to do it seems to last almost all day. The kit comes with great instructions and everything that you're going to need to do the job and be happy with the results. I have never replaced a battery in a phone that was sealed, with these instructions I was able to take it apart replace the battery and get it back together within a half an hour. If you need a battery I highly recommend this one. This is an all-inclusive kit, it includes the battery, tools, new seals and great instructions. I highly recommend
R**B
Great Battery Pack - Saved My Phone
My OEM battery stopped reading the battery charge and it rendered my phone useless when not plugged in. I bought this as a final attempt to avoid buying a new phone. I was surprised to find this is the same manufacturer as the battery I removed, but an updated version. It has been working great and installation was straightforward. More than enough tools in this kit. You don't need to buy anything else.
E**Z
WARNING! Do not use included adhesive strips as they are
*** When placing the battery down in its place, be sure to REMOVE enough of the adhesive strips, so that the adhesive will not seat on top of the circuit ribbon that runs underneath the battery. *** If you don't remove enough adhesive it will come in contact with the circuit ribbon and it will be impossible to remove the battery without breaking the ribbon like I did (see attached photo). The consequences of breaking that ribbon seem to be: unable to detect battery charge level, and unable to fast-charge; but I can't say for sure. Also make sure that the battery connector is perfectly aligned with its socket (mine was maybe 0.5mm off and this is why I had to remove the battery, it wasn't charging, most likely connector was loose). Battery seems to work (unsure if the lack of fast-charging is because of the battery itself or the broken ribbon); tools are fine; manual was not detailed enough, independent online videos are way better. UPDATE: I took the phone to a technician, the battery was defective (that's why it wasn't charging in the first place). The ribbon I broke handles the squeeze function of the phone, can be replaced but I decided against it. Amazon seller offered a full refund, I accepted, still waiting for it.
Trustpilot
2 months ago
2 weeks ago