🎯 Paint Like a Pro, Finish Like a Boss!
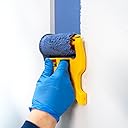
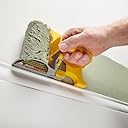
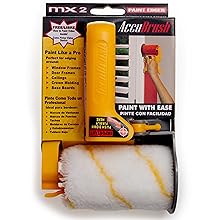
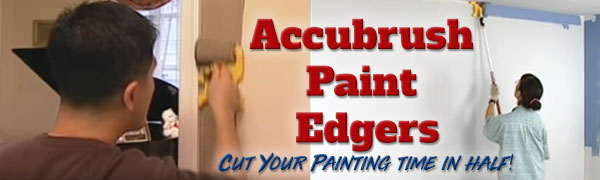
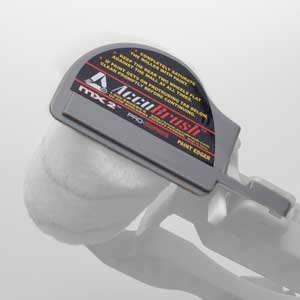
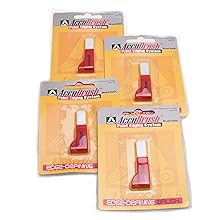
The Accubrush MX Paint Edger 11 Piece Jumbo Kit is a professional-grade painting tool set designed to cut painting time in half by eliminating the need for masking tape. Featuring 4-inch flagged bristle brushes and washable, reusable rollers, this lightweight ABS kit delivers precise, clean edges around trim, doors, and windows. With a 29-day money-back guarantee and 97-day warranty, it’s the smart choice for efficient, flawless painting projects.


| ASIN | B000T4G4QQ |
| Best Sellers Rank | #338,702 in Tools & Home Improvement ( See Top 100 in Tools & Home Improvement ) #99 in Household Paint Edgers |
| Brand | Accubrush |
| Brand Name | Accubrush |
| Bristle Type | Flagged Bristle |
| Brush Width | 4 Inches |
| Color | Yellow |
| Customer Reviews | 3.5 out of 5 stars 6,414 Reviews |
| Item Weight | 7 Ounces |
| Manufacturer | Accubrush |
| Manufacturer Part Number | 130 |
| Manufacturer Warranty Description | 97 day manufacturer warranty from date of purchase. |
| Material | Acrylonitrile Butadiene Styrene (ABS) |
| Material Type | Acrylonitrile Butadiene Styrene (ABS) |
| Model Number | MXJK |
| Paint Type | Interior Latex |
| Set Name | Accubrush Paint Edger Kit (11 Piece) |
| Size | MX, 4 Rollers, 4 Brushes |
| UPC | 716080022619 853015000158 |
| Unit Count | 1.0 Count |
J**R
not a gimmick, easier, less time, ...
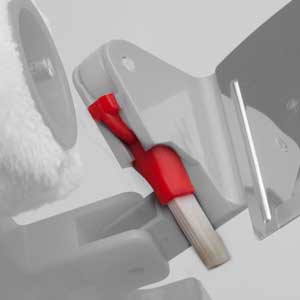
I thought this was a gimmick thing and after the first time I'd go, yeah, they tried and I tried it and so a little money down the drain... It actually works very well. I still taped well and i still will because mistakes happen, but this makes very clean lines even on our derpy bumpy not straight walls. My ceiling is untouched and clean lines!! I'm very impressed, though it has a few things they need to correct. For example, the clip to hold the brush on need to be moved 90 degrees to avoid occaisonally getting paint on it having it drip. somehow make it so you can remove the edger section so you can just roll a bit without it in the way. There will be some minor expense in replacing the little brushes, but i think well worth the benefit of this tool. Also, hope they can simply and lighten it a bit. Be aware you should hand paint into corners before you start as it can get everywhere, but again absolutely worth it once you start rolling an paint a clean line it is great. another tip, rolls in the direction of the wheels to keep them a bit cleaner and avoid them messing up paint. I roll a bit then lift the wheels a bit and go back over - works great. So, a little learning as you get going, but actually a very very handy tool and worth the high price tag, but hopefully they'll lower that.
-**.
There is a major flaw with this product that every user has had to witness!
I'm not impressed with this thing at all. Don't get me wrong, the idea is very good, but the roller / brush combo works in only one direction. That is, if you're painting a vertical surface, this paint edger can be used only up to the last maybe 4-5" from the edge of the ceiling. From there, you would have to free-hand it, (usually having taped the edge to get the fine edgeline) which will negate ever needing this tool. Imagine using this tool to paint the top of the wall where the ceiling meets that wall. Where the wall meet the 90-degree angles (the adjacent left and right walls), this roller can't fit the beginning first few inches and the last few inches. Sure, it can paint the span of length between those adjacent walls very well, however it doesn't paint the entire length, which is what I expect it to do. The same problem will be had when edging vertically; the fist few inches at the bottom of the wall (as the baseboard or floor) and the last few inches at the top (where the ceiling meets) can't accommodate this tool. This problem is due to an inherent design flaw. Because the edger brush is located on only one side of the roller; you can't flip over the tool to work in the opposite direction because the brush will now be on the bottom. Yes, even when working in one direction, the ends (beginning and end) of that surface will be left 'un-edged'. Also, the edger brush is located BEHIND the roller, so you couldn't edge close enough to the end of the wall / ceiling or wall / floor anyway. I would think the whoever invented this tool (as well as the R & D folks) would have adjusted for this real problem by putting the brush on both sides of the roller as well as in front of the roller (and possibly a tab wider). I'm sorry to report that this tool is a very flawed gimmick that simply doesn't perform as well as intentioned. Again, it's a pretty good idea, but the final design is still flawed. Maybe having the edger brushes on BOTH SIDES of the roller and positioning them IN FRONT of the roller would help immensely. Also, no roller would roll up to the edge, so maybe having a flat sponge (instead of a roller) that's level with the brushes would help get the edging (cutting in) job done as advertised. I'm returning this unused product for a refund. So, I'm back to taping and free-handing my edging / cut-ins.
P**8
not perfect, but helps
Info: 30yr old, painted 2 apartments 1 townhouse 1 house, painted with impressed father, 1700 sq ft house, every room, used accubrush on 70% of house. I was impressed. This item excels at door and closet frames. YOU DON'T NEED TO TAPE DOORS, CROWN MOLDING, BASEBOARDS AND CLOSET FRAME. <Yeah read that again, if you have taped these before you will already be buying this. The line it makes is incredible! However it doesn't work as well as the youtube video I saw of it. Because the shield is only on one side of it, you will eventually have to use a brush to finish the job on a door or any trim that touches the floor(you'll see). I did need a touch up brush a few times, but the tray has a slot to hold this brush which I liked, major convenience (1 inch brush worked well, nothing major required). I was able to walk around with my accubrush and 1inch brush and pretty much handle any detail work in a house. This item will speed up your painting. I used a brush for the the ceiling detail work on the first coat, and the accubrush for the detail on the second coat. Lightening!!!! I would not use this item for 1st coat ceiling detail work because it just can't get the line right with textured or uneven ceilings. But it did reduce my overall time significantly. Especially along the baseboards (1st and 2nd coat with accubrush). Estimated saved time on a 10x11 bedroom 1-2 hours (I painted an entire 1700 sq ft house, every room), this time adds up with such a large project. Does not do textured ceiling lines well (I have textured ceilings not popcorn, but probably doesn't do popcorn well either). But as mentioned above, I used a brush the first time to get things perfect, and the accubrush the second time just to go over things. No one will notice a 1 cm mistake along the ceiling if you do 2 coats close to ceiling line.(9ft ceilings) The tray is too small by about an inch. And there is no comfortable way to hold it or pick it up. NOTICE to the maker. You will get fingers dirty trying to move the tray, but not with the actual product which is unfortunate. Overall would highly recommend. Saves time without a doubt. Two man teams would be ideal for this product, for large jobs. One man on a roller and one on detail work with accubrush. REAL TIME SAVER! Just don't expect magic and you will be impressed! Also: tried 2 other types of edge devices from HD. This one beats them both! More durable and reusable. Also is a regular 4 inch roller in small areas (small detail but a big plus around light switches and outlets).
M**R
Waaaay better than using tape.
I absolutely love this product. Not sure why it took me so long to find it. Here's my two cents and what I used it on. I just did my basement from floor to ceiling so keep in mind everything was new and fresh with old paint to worry about. 1) For the ceiling, it did a really great job. It's really all dependent on how well your corners were drywalled and what texture was used on your ceiling for it to get the tightest fit to the corner. I had a smooth ceiling so it was really easy to use. I can imagine a textured ceiling might present issues. 2) Along baseboard and trim, the product was absolutely brilliant!!! Perfectly cut and straight lines. 3) My only gripe is the fact that you really need to use their rollers. The roller itself locks into the edger and you can't find these rollers at any store that carries paint from what I can tell. Just for fun, I'm going to try out a standard roller for fun and see how well it actually stays on without rolling off. I'd highly recommend anyone to use try out this edger as I couldn't be any happier. In fact, I'm going to order a bunch of extra brushes and rollers for it just so I have it on hand should I want to paint something else.
J**W
Works better than other products
I have tried many different edging products before and none of them seem to do the job I expected. I always end up starting to use it and finishing it up by hand. Along comes the accubrush MX and my process was reversed! Being skeptical I started off cutting in the ceiling by hand -- that got old real quick! I tried the accubrush and it actually worked! The line was as close to the ceiling as possible and was very straight! It did take a couple of rolls, but it got there eventually. Towards the end of my project, the quality of the paint job deteriorated a little bit. Sometimes some paint would get on the ceiling or paint would drip off of the holder (we had prepped the floor before so it just went onto the plastic). It definitely saved time even with having to go over the ceiling. The reason why I only gave it 3 stars was because when going around the door trim it would scrape the wall. The video says to put pressure in a certain spot. Apparently I did too much and it kept scraping the drywall, to a point where I had to spackle and repaint. This only was a problem towards the end of my edging so maybe it had to do with it being used a bit and not clean? Not too sure on this one. Cleaning was simple! I just threw away the roller and some hot water got the paint right off of the rest of the edger. Overall, I am happy with my purchase and the price I paid (I dont think it would be worth it to pay any more). It saved me loads of time and frustration. I bought it mainly for cutting in the ceilings and I went from about a 2-3 hour paint job to about a 30 minute job. If you are buying this to be perfect and still not have to do any touch ups you are going to be disappointed. But if you want to save some time and make things a bit easier, then this is a great investment.
J**E
It doesn’t work that great.
There’s no free lunch, there’s no magic bullet, and there’s no gimmick that makes cutting in easier, better or faster than doing it manually with a brush and a steady hand. If there were, professional painters would use it so they could move onto their next job sooner. This device kinda works a little bit. But it’s not perfect and I needed to go back to correct the line every single time I used it. I’d use it again only in an area with limited exposure and if I were in a huge rush. Like if I were painting the wall above kitchen cabinets that no one will see. The issue with this device is that you need to load it up with a ton of paint. If you don’t have enough paint on it, you then need to roll back and forth which this device is not designed to do. When you do that, the back wheels will get wet and dig into the surface pushing the paint leaving you with a paintless line exactly where you don’t want it. If you load it with too much paint, the small brush gets overloaded and paint seeps outside of the device onto the guard which puts paint exactly where you don’t want it. You have to have exactly the right amount of paint on it at all time which is obviously impossible since it’s whole purpose is to distribute paint from the roller to the surface. This was priced way too high for its flawed application.
T**N
Works the second time
This thing actually works. It did not seem work at first but I stuck with it and learned a few things. 1- Break in the roller 2- Apply two coats 3- Prep the joint 4- Use proper technique To begin with, I used Sherwin Williams paint and a standard paint tray with a roller screen laid on top to distribute the paint evenly through the roller. The paint screen helps to distribute paint evenly while maintaining a proper load of paint. After I gained more experience I didn't seem to need the roller screen. First, rollers need a break-in period anyway so use the roller once (for the first coat) then clean it and use it again for the final coat. Second, you need to learn, understand, comprehend and believe (yes, all 4) that to be done properly brush and roller work must receive at least 2 coats! The video for this product would have you believe it works perfect on the first coat. No way, once I saw the results of the first coat I was disappointed but then I and remembered, 'nothing covers in one coat' and I applied a second coat... WOW, perfect inside corners. Third, it must have a proper corner to paint to if the two surfaces do not actually meet (like some molding to wall joints) then you must first caulk the joint to get a proper corner. When caulking for paint use a painters caulk and remember the first rule of caulking 'LESS IS MORE'. Use a sharp knife to trim the end of the caulk tube and trim it to make a hole smaller then you think you need. It is much easier to go back over a caulk gap then to have to remove big glop's of caulk. Last, use the technique in the video, it works. Recommendation: I recommend this product for anyone who has trouble painting a straight line. If you can paint a straight line with a brush then don't buy this you don't need it. If you can't it will pay for itself on the first job in tape, taping time and painting time.
P**S
Great for new construction I would assume...
Let me start off with that I loathe painting. I put it up there with getting holes drilled in my teeth. I might even prefer that over painting, frankly. So I will find any and all options of making my life easier when it comes to painting, obviously. I'm assuming that I am like most people, as in I don't live in a new construction house. I live in a house where the previous home owner was a "do it yourselfer" reject. We nicknamed him "can't do right". Cuz he sure as heck couldn't do anything right in this house. But I digress... My point was that I'm assuming in new construction where you have all nice sharp corners every where, this might actually do a decent job. But in a house, such as mine, this thing couldn't edge at all. I had unpainted spots. Because I literally had to load up the roller, I had insane dripping/paint running. And while this is no fault of the company that makes this item, because the previous home owner was too cheap or lazy to drywall properly, many of the corners appeared to be caulked. I'm assuming so that way they didn't have to play with drywall mud. Regardless, because of my particular situation, I can't honestly give this item few enough stars. I honestly thought I hit the jack pot with this item. That was not at all the case. Like many other people who have reviewed, just stick with tape and a good paint brush. It's probably cheaper and would give better lines without the paint running everywhere.
K**H
Paint roller
Great product for getting the job done quickly. No more messing around trying to cut in with a brush. Easy to set up and use. Perhaps someone may look at making a 2 sided function one in the the future
A**R
With a little practice you can edge pretty quick. The small brush is a little stiff ...
Worked well. With a little practice you can edge pretty quick. The small brush is a little stiff so you may need to touch up a few spots that don't get covered completely.
M**.
Helpful paint tools
What I received was great quality and very useful These items will help make you a much more confident amateur painter
G**E
Mode d'emploi en anglais.
Mode d'emploi en anglais. Pas de problème pour moi car je suis anglais, mais si vous ne pouvez pas lire l'anglais, vous ne saurez pas comment l'utiliser correctement, mettez de la peinture là où vous ne le voulez pas et portez plainte. Il existe des instructions sur YouTube et je vous suggère de voir si vous pouvez déterminer comment les utiliser. La façon dont vous commencez à peindre est TRÈS importante, comme expliqué. Vous ne pouvez pas simplement le frapper sur le mur contre le bord et commencer à rouler. Si vous pouvez le résoudre, il fait exactement ce qu'il dit. Il existe deux modèles et celui-ci est le moins cher et il est droitier. L'autre a une poignée qui tourne pour que vous puissiez l'utiliser avec l'une ou l'autre main. Celui-ci rend la tâche difficile car vous montez du côté droit d'une porte, en haut et en bas du côté gauche. Vous ne pouvez faire le tour d'un bord du mur au plafond que dans un sens. L'autre modèle, plus cher, vous permet de tourner la poignée pour pouvoir monter des deux côtés de la porte et dans les deux sens autour d'un plafond. Je choisirais le plus cher la prochaine fois, s'il y a une prochaine fois et c'est la question. Combien de fois par an allez-vous l'utiliser et pouvez-vous justifier de payer pour le modèle le plus cher ?
E**B
Set of money, doesn't work well at all.
Unfortunately this does not do the job it suggests. its poor quality and doesn't work! No short cuts for taping and painting carefully!
Trustpilot
3 weeks ago
3 weeks ago